
How to Choose Wall Plugs and Screws: A Practical Guide Before Drilling
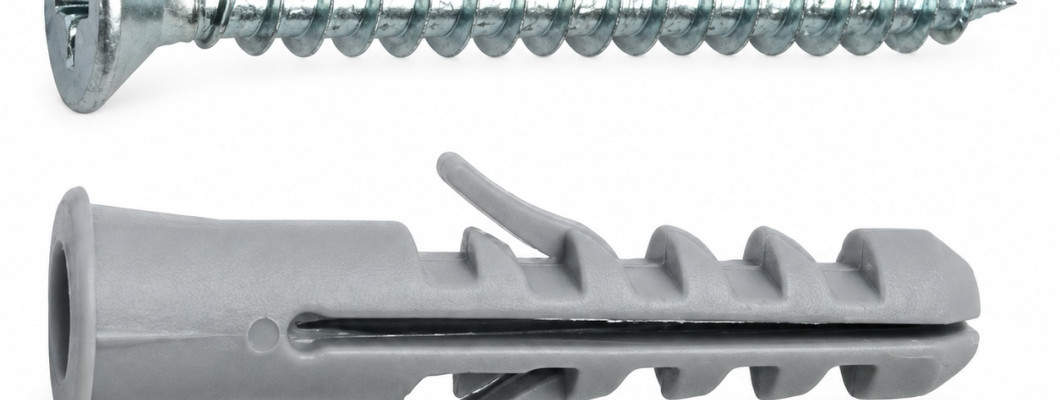
How to Choose Wall Plugs and Screws: A Practical Guide Before Drilling
A bracket, organiser or household accessory may arrive with mounting holes but leave you to choose the wall fixings. That is often where a straightforward project becomes uncertain. Several plugs look similar, the screws come in different lengths, and the wall’s painted surface tells you little about what lies behind it.
Choosing properly means matching the wall, fixing system and accessory. It also means understanding what the finished installation will carry and how people will use it.
This guide helps you gather the right information before buying or drilling. It explains what to measure, which details to confirm and when to ask for professional help. It does not prescribe one drill size, hole depth or load capacity for every wall plug.
Quick answer
Choose wall plugs and screws according to the wall material, accessory mounting requirements and intended load. Use the instructions for the exact fixing system to establish compatible screws, drill dimensions and installation requirements.
Check the proposed drilling location for concealed services using appropriate methods and available building information. If the wall construction, fixing compatibility or drilling location remains uncertain, resolve that uncertainty before proceeding.
Contents
Understand the fixing system
Identify the wall and its condition
Describe the complete mounting task
Read dimensions without confusing them
Check the bracket and screw connection
Prepare a useful purchase enquiry
Plan the location before drilling
Recognise installation problems
Checklist and quick answers
Frequently asked questions
Understand the relationship between the components
The screw connects the accessory to the fixing arrangement. The wall plug works within the supporting material according to its particular design.
Those components need to be compatible with each other and with the wall. A screw entering a plug does not establish that the combination is suitable for the project.
Different anchoring systems serve different building materials and applications. Treat the fixing as a complete selection rather than choosing a plug first and adding whichever screw happens to fit through the bracket.
Describe the task before asking for a size
Start with a short description of what you want to install and how it will be used.
“Mount a small organiser” is a beginning, but the useful details include its contents, mounting points and whether it will be handled repeatedly.
Photograph the accessory from the front and back. Keep any supplied installation guide available.
A seller or installer can respond more accurately to a specific description than to a request for “a strong screw for the wall”. The task determines which information matters; the available hardware should not determine the task.
Look beyond the visible finish
Paint and tiles describe what you can see, not necessarily the material providing support behind them.
Two walls can have similar finishes but different constructions. A tiled area may also involve layers that matter to the installation.
Use reliable information about the building or seek an assessment when needed. Do not label an unknown wall as concrete simply because it feels hard or looks substantial.
If the construction is unknown, record it as unknown. That keeps an assumption from becoming the basis of the fixing choice.
Distinguish solid construction from hollow construction
Fixing manufacturers provide different products for solid materials, hollow masonry, boards and other substrates. A method used successfully on one wall cannot automatically be transferred to another.
Even after identifying a broad category, check that the selected fixing is documented for the relevant material.
A product described as universal still has instructions and application limits. Read those rather than treating the name as permission to use it everywhere.
Where the product page does not establish wall compatibility, obtain that information before buying for a specific installation.
Assess the condition of the proposed area
Wall type is only part of the assessment.
Look for existing damage, crumbling material, previous repairs or an enlarged hole. Do not assume a clean finish proves that the underlying area is suitable.
If the location has already failed to hold a fixing, investigate the cause instead of immediately installing another one.
Moving the position slightly is not a guaranteed remedy either. The new location still requires assessment, including checks for concealed services. Resolve the condition of the supporting area before considering the installation ready.
Consider the accessory after it is filled
An empty shelf or holder may weigh much less than the arrangement you intend to use.
List the normal contents and consider future use realistically. A shelf installed for a few light objects can gradually become a place for books or other heavier belongings.
Use appropriate measurements where weight information is required, but remember that weight alone does not select the fixing.
The wall, accessory design and installation conditions still need to match the documented application. Avoid choosing hardware around an artificially empty version of the finished project.
Include everyday movement in the description
Some accessories remain still. Others are opened, pulled, pressed or handled repeatedly.
Explain those actions when asking whether a fixing is suitable. A small object can still be used in a way that matters to the mounting arrangement.
Do not transfer a general load claim to a different type of use without confirmation.
This is particularly relevant when replacing an accessory’s specified fixing method. The original instructions may account for details that are not obvious from looking at the mounting holes.
Inspect the bracket before shopping
Identify every fixing point and note its shape, location and accessibility.
Some accessories have a separate mounting plate. Others have recessed holes, a cover that closes over the screws or an installation sequence that depends on access from a particular direction.
Photograph those parts rather than sending only a front view of the finished item.
Keep the original components together. A missing plate or spacer should not be replaced casually with unrelated hardware simply because the accessory appears to sit against the wall.
Separate screw size, plug size and drilling dimensions
Several measurements may appear on a package, but they do not all mean the same thing.
The screw has its own dimensions. The plug has dimensions and compatible screw requirements. The installation instructions may specify hole diameter, depth and other conditions.
Read what each number describes.
Do not assume that the screw diameter is the required drill diameter, or that the plug length alone determines hole depth. Use the information for the exact fixing system rather than applying a remembered rule from a different product.
Include the thickness of the mounted part
The screw must pass through the relevant part of the accessory before engaging with the fixing arrangement.
That thickness belongs in the selection process. Looking only at the wall plug can overlook the bracket or base that sits between the screw head and the wall.
Provide this measurement when requesting compatibility advice and follow the accessory’s installation guidance.
Do not add unapproved spacers or washers simply to make an unsuitable screw length appear workable. Select the appropriate combination instead of improvising around a mismatch.
Check the screw head and driver
A screw with suitable dimensions may still have a head that does not fit the accessory correctly.
Look at whether the head must sit in a recess, pass through a shaped opening or remain clear of a cover.
Then identify the correct driver for the screw. A loosely fitting tool is not a good reason to apply more force.
If the head type or required tool is unclear, include that question in your enquiry. The connection needs to work during installation as well as in the finished arrangement.
A wall plug and screw option from K&M Shopping
K&M Shopping lists a Wall Anchor and Screw Set with nominal 6, 8 and 10 mm options. The description identifies an expansion plug paired with a screw.
Component lengths and a maximum load are not specified. The stated box quantity is 50 pieces, but the distribution between screws and plugs is unclear; do not interpret that as 50 complete pairs without confirmation.
Product details:
https://k-m.store/shop/en/k16-screw-with-fisher
Confirm the selected option’s dimensions, contents and documented applications before ordering for a particular wall or accessory.
Do not read a product code as a measurement
A number in a URL, stock reference or product name may identify an item without describing its size.
For example, the K16 reference in this product’s address should not be treated as an instruction to use a 16 mm drill bit.
Use the actual option description and supplied technical information.
Also avoid assuming that a nominal size represents screw length. When the meaning of a number is unclear, ask what component and dimension it describes before using it to plan the work.
Prepare one complete purchase enquiry
Gather the information in a single message:
What you intend to mount.
What it will carry during normal use.
The known wall construction and condition.
Photographs of the accessory and mounting plate.
Hole dimensions and mounted-part thickness.
Any installation requirements supplied with the accessory.
Then ask for the compatible option, package contents and installation data.
This gives the seller a practical question to answer and helps you recognise when essential information is still missing.
Check what “pieces per box” means
Package quantities can refer to individual components or complete sets. The distinction matters when calculating what to order.
Ask how many screws and how many plugs are supplied in the selected size. Check whether all pieces share the same dimensions.
Do not count the objects in a promotional photograph as a packing list.
Clarifying quantity also prevents a common planning problem: arranging time for the work, then discovering that the delivered components do not provide the number of complete fixings expected.
Rehearse the location before drilling
Use a suitable temporary marking method or a paper template to check the accessory’s position.
Open neighbouring doors and drawers. Consider reach, viewing angle and the space occupied by the item when it is in use.
This trial answers whether the location is convenient. It does not establish whether the wall can be drilled there.
Keep those decisions separate. A position can work well for everyday use but still need to change after checking the construction or concealed services.
Check for concealed cables and pipes
Review available building information and use suitable detection equipment according to its instructions before drilling.
Do not assume a location is clear because no socket or pipe is visible nearby.
Detection tools have limitations, and certain materials or conditions can affect what they identify. An absence of a signal should not be treated as an unconditional guarantee.
If the result is unclear or you cannot establish the proposed location’s suitability, stop and seek qualified assistance. Drilling is not a method for discovering what is behind the finish.
Prepare the drill and work area appropriately
Once the fixing and location have been confirmed, follow the tool and fixing instructions for the task.
Select the required bit and operating method for the material. Prepare the protective equipment and work area specified for the work, including appropriate eye protection.
Do not assume every drill setting is suitable for every surface.
If you are unfamiliar with the tool or cannot identify the correct setup, get help before starting. Having the screws and plugs ready does not mean the rest of the installation requirements have been resolved.
Understand the installation stages
A typical planning sequence includes preparing the specified hole, cleaning it as required, placing the fixing and attaching the accessory using the prescribed method.
This is an overview, not a universal installation procedure.
The exact dimensions, cleaning requirements, fixing position and tightening instructions depend on the selected system and material.
Keep the relevant guide accessible throughout the work. If a necessary detail is absent, clarify it rather than substituting an instruction remembered from another type of anchor.
Stop when the installation behaves unexpectedly
If the plug spins, the bracket will not sit properly or the fixing feels unstable, do not make extra tightening your automatic response.
The symptom needs investigation. It may involve compatibility, hole condition or an installation issue.
Do not pack the hole with unrelated materials or substitute a larger screw simply to create resistance.
Remove the load and obtain an appropriate assessment or repair method. A temporarily firm feeling is not evidence that the original problem has been corrected.
Treat an old hole as a separate assessment
An existing hole may save marking work, but it is not automatically suitable for a new fixing.
Its size, depth, condition and location may not match the new system. It may also have been altered during removal of previous hardware.
Do not judge suitability solely by whether the new plug enters it.
Have the area assessed where necessary and use a documented repair or installation approach. Reusing the location is a compatibility decision, not simply a way to avoid drilling another hole.
Example: a small home-office holder
Before mounting a holder, arrange its intended contents and check the position from your normal working posture.
Make sure it does not obstruct drawers, equipment or visible cables. Then gather the mounting and wall information.
You may find that a different position on the desk solves the problem more simply. If wall mounting still offers a clear benefit, select the fixing around that confirmed task.
The objective is a better workspace, not drilling merely because an empty section of wall is available.
Example: a shelf with changing contents
A shelf needs to be considered together with its brackets, fixings, wall and intended contents.
Do not evaluate it only while empty or assume additional fixing points provide a capacity obtained by adding numbers.
Where the application requires a defined load performance, use a documented system and obtain professional assessment when needed.
Keep the intended use clear after installation. Changing from a few decorative objects to substantial storage is a new decision, not an automatic extension of the original setup.
Know when professional help is useful
Ask for help when the wall construction is uncertain, services cannot be ruled out, the area is damaged or the required application lacks suitable fixing data.
Heavy, overhead or safety-critical installations deserve an appropriate assessment rather than a trial with general-purpose hardware.
Professional input is most useful before unsuccessful attempts damage the location.
Provide the complete use case, including contents and handling. That allows the installer to assess the actual task rather than just the empty accessory.
Keep a record and reassess changes
Retain the product information, selected size and accessory instructions.
If the installation’s purpose changes, review its suitability before adding contents or replacing the mounted object.
Notice unexpected movement, leaning or changes around the fixing area. Remove the load appropriately and investigate rather than testing it by pulling hard or hanging from it.
Ongoing observation can identify changes, but it does not create a load rating that was never established in the first place.
Common mistakes
Choosing dimensions from a product code.
Confusing screw diameter with drill diameter.
Ignoring bracket thickness.
Assuming identical finishes mean identical walls.
Borrowing another product’s load rating.
Reusing an old hole without assessment.
Increasing force to conceal an installation problem.
Buying bulk quantities before confirming compatibility.
Before-drilling checklist
Define the item and complete intended use.
Identify the wall or arrange an assessment.
Read the accessory’s instructions.
Record opening dimensions and part thickness.
Confirm the plug and screw combination.
Obtain the required installation data.
Clarify package contents.
Rehearse the location.
Check concealed services.
Resolve essential unknowns before proceeding.
Quick answers
A similar-looking plug is not proof of equivalent performance.
The selected fixing instructions determine drilling requirements.
An empty accessory does not describe its normal loaded use.
More fixing points do not automatically establish a greater capacity.
A good-looking finish does not identify the structure or services behind it.
Frequently asked questions
How do I choose the right wall plug and screw?
Match a documented fixing system to the wall construction, accessory requirements and intended use. Gather the relevant measurements before selecting a size.
Does K16 mean the product is 16 mm?
No such measurement is established by the code. Use the actual option and technical information rather than interpreting the URL as a specification.
Are the listed sizes screw lengths?
That is not confirmed. The options are described as nominal sizes, while component lengths are unspecified. Ask for clarification before planning installation.
Which drill bit should I use?
Follow the instructions for the exact fixing and wall material. Do not select a bit by comparing it visually with the photograph.
How much weight can this set hold?
No maximum load is documented on the page. A capacity from another product or another wall should not be transferred to this set.
Can I use any screw with a wall plug?
No. Compatibility includes dimensions and the accessory connection. A screw entering the plug is not enough to establish suitability.
Can I reuse an existing hole?
Only after its condition and dimensions have been assessed against the new fixing requirements. An available hole is not automatically a suitable one.
What if the plug spins while tightening?
Stop and investigate instead of applying more force or adding improvised packing. Obtain an appropriate correction for the underlying problem.
Does a detector guarantee a clear drilling position?
No detector provides an unconditional guarantee in every situation. Follow its instructions, use available building information and seek help when uncertain.
Is a hand check enough to prove the fixing is safe?
No. A brief check cannot establish an undocumented capacity. Correct selection and installation remain the basis of the mounting arrangement.
Step by step: prepare before you drill
Photograph the accessory, record its mounting details and describe the intended contents. Identify the wall and select a compatible fixing with clear instructions.
Plan the location, check concealed services and prepare the correct tools—or arrange professional installation.
Follow the specified procedure, retain the information and reassess the setup before changing its use.
Conclusion
Choosing wall plugs and screws is a matching task involving the wall, fixing and accessory. Resolve those relationships before starting the hole.
Clear measurements and reliable instructions are more useful than selecting hardware that merely looks strong.
Quick summary
Identify the wall, measure the bracket, confirm component compatibility and check concealed services. Do not invent drilling dimensions or load limits. Where the information is incomplete, resolve the gap before proceeding.
Read also
For selected applications where drilling may be avoidable, explore the adhesive wall screw guide:
https://k-m.store/shop/en/adhesive-wall-screws-no-drill-mounting-guide
For maintenance and organisation supplies, visit K&M Shopping:
https://k-m.store/
Leave a Comment