
Wall-Mounted Toothbrush Holders: A Practical Guide to Fit, Placement and Shared Bathrooms
Wall-Mounted Toothbrush Holders: A Practical Guide to Fit, Placement and Shared Bathrooms
A bathroom counter can feel crowded long before it runs out of space. A toothpaste tube sits behind a brush cup, spare products collect beside the tap, and someone leaves their toothbrush on the nearest clear edge because putting it away is awkward. Buying another organiser does not necessarily solve that problem. First, the everyday items need a layout that people can actually use.
A wall-mounted toothbrush holder can give brushes a defined place while leaving more of the basin surround available. Whether it works well depends on the handles it needs to accommodate, the fixing method, the available wall space and the people sharing the room.
This guide explains how to assess those details, plan a practical arrangement and check whether the change helps. It also covers the confirmed features of K&M Shopping’s four-slot holder without assuming dimensions, materials or mounting accessories that the listing does not specify.
Quick Answer
Choose a wall-mounted toothbrush holder by checking brush fit, daily brush count, mounting requirements and access. Allow room to remove each brush without disturbing its neighbours, and position the holder where it does not obstruct a cabinet or routine movement around the basin. Confirm the fixing instructions before installation. A holder organises brushes; it should not be treated as a sanitiser or an electric toothbrush charging base.
Contents
Identify what is making the counter awkward.
Decide whether wall storage suits the room.
Count brushes and check handle fit.
Plan placement and mounting.
Review the K&M holder’s confirmed features.
Set up a shared arrangement.
Test everyday situations.
Clean and review the setup.
Check common mistakes and practical questions.
Follow a simple starting plan.
Start with the Counter, Not the Product
Look at the basin area during normal use. Which items move every morning? Which ones have not been touched recently? Does someone need to lift a cup to reach the toothpaste? These observations reveal whether the main issue is crowding, unclear ownership or inconvenient access.
Separate daily items from reserves. An unopened replacement brush does not necessarily need the same accessible position as the brush used every day. Keep reserve products in appropriate storage and follow their packaging instructions. Then assess the space that the current routine genuinely requires.
A useful test is to put the remaining items in clear positions without buying anything. If that arrangement works, a new holder may be unnecessary. If brushes still lack a reliable home or make the surface difficult to wipe, wall storage may address a specific problem.
When a Wall-Mounted Holder Makes Sense
Wall storage is worth considering when there is suitable wall space near the basin and the counter is needed for other tasks. Giving brushes individual positions can also make the arrangement easier to understand in a shared bathroom.
However, the holder must remain convenient to use. Moving clutter above the counter is not helpful if a cabinet door hits the brushes or someone cannot reach their slot comfortably. Evaluate the complete movement of taking out and returning a brush.
A countertop arrangement may be more suitable when the fixing method is incompatible with the available surface or the wall position is awkward. The better choice is the one that suits the room and routine. There is no need to change a working arrangement simply because another style is available.
Count the Brushes You Actually Use
Start with the number of brushes needing an everyday position, rather than the number of people in the home. One person may use more than one brush, while travel brushes and replacements may belong in separate storage.
A four-slot holder provides four possible positions, subject to fit. It does not establish that every combination of four handles will work together. The shape of the brushes and the spacing of their heads still need consideration.
Empty slots are acceptable. Two people do not need to fill the remaining positions with accessories simply to make the holder look complete. If the daily brush count exceeds capacity, plan another appropriate location rather than putting two brushes into one opening.
Check Fit as a Movement, Not Just a Measurement
Handle width matters, but a brush that enters an opening is not automatically comfortable to use there. Consider how the handle sits, whether it stays in its intended position and whether removing it requires an awkward tug.
Where slot measurements are available, compare them with the relevant part of the handle. If measurements are missing and your brush has a broad or unusual handle, ask for clarification before relying on compatibility. A photograph of a different brush cannot settle that question.
Next, consider the whole group. Can one brush be removed without knocking another? Do the heads remain apart in their intended positions? A different arrangement may help, but some brushes may need a separate solution. Avoid forcing a handle into an opening that does not suit it.
Electric Toothbrushes Need Their Own Check
Electric toothbrush handles vary, so compatibility should be assessed for the particular brush you own. Do not assume a wall holder accommodates a powered handle because it accepts a slim manual one.
Keep storage and charging requirements separate. Unless a product explicitly includes a charging function, it is not a charging base. Follow the toothbrush manufacturer’s instructions for its base and accessories. A mixed bathroom setup can work well: compatible manual brushes in one holder and an appropriate separate arrangement for an electric model.
Choose the Position Around Everyday Movement
Before fixing anything, open nearby cabinets and mirror doors fully. Reach for the tap, soap and toothpaste as you normally would. Identify a wall area outside those movements, rather than choosing the first empty patch.
Account for the brushes as well as the holder. They need space in their stored position and during removal. If the proposed location is tight, obtain the product dimensions first. Once you know them, a paper outline can help visualise the footprint without prematurely attaching anything.
Check the position with the people who will use it. A height that suits the installer may not suit everyone else. For children, consider actual reach and appropriate supervision rather than assuming one universal mounting height.
Keep the holder away from direct splashing where possible, and do not hide it behind tall bottles. Restore the usual counter items before making the final decision. A location that looks convenient beside an empty basin may work differently once the bathroom is back in everyday use.
What the K&M Toothbrush Holder Offers
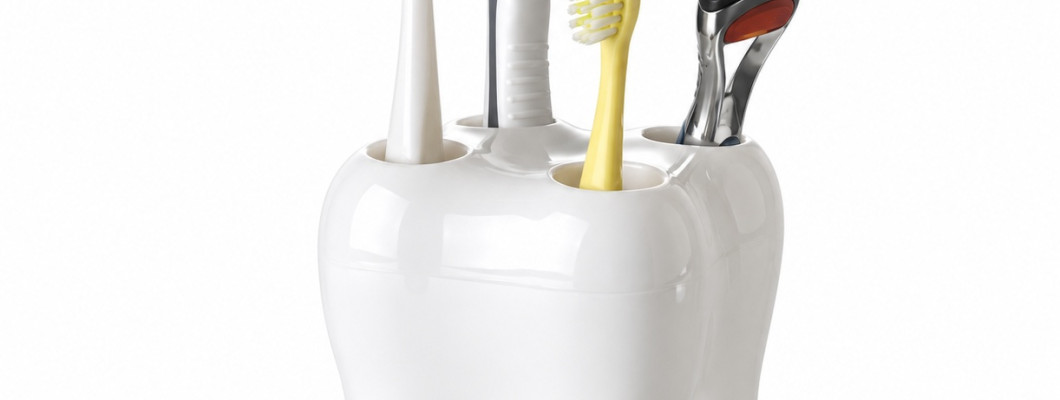
K&M Shopping lists a solid-white, wall-mounted toothbrush holder with separate slots for up to four brushes. It requires no electricity or batteries and is intended to organise brushes in a defined position near the washbasin.
You can review the product here:
https://k-m.store/en/s84-toothbrushes-stand
The confirmed package content is one holder. The listing does not specify its exact material, overall dimensions, slot measurements or fixing hardware. Toothbrushes, cups and a toothpaste dispenser are not listed as included. Clarify any missing detail that determines whether it will work in your bathroom.
Its role is straightforward organisation. Assess it against that role rather than expecting it to support bottles, provide charging or sanitise brushes. Toothpaste and other accessories can have separate positions that complement the holder without crowding it.
Plan Installation Before Preparing the Wall
Confirm the actual mounting method and instructions before selecting tools or preparing the surface. The product listing establishes that the holder is wall-mounted but does not identify whether its fixings are adhesive, screws or another arrangement.
Check that the fixing method is suitable for the intended surface. Clean and dry the installation area as required, then follow the instructions supplied. If those instructions specify a waiting period or particular conditions, follow them rather than borrowing a timing rule from an unrelated product.
Once installation is complete and the holder is secure, try a compatible brush before adding the others. Recheck access, head spacing and nearby doors. Address any difficulty before treating the arrangement as the household’s permanent routine.
Give Each Person a Recognisable Position
A shared bathroom works more smoothly when people know where their own brush belongs. Agree on a simple position for each user, while ensuring everyone can identify the brush itself. Location alone can become unreliable if items are moved during cleaning.
The arrangement should be easy to remember without repeated explanation. If someone needs a different slot because of reach or handle shape, make that adjustment openly. Avoid quietly swapping brushes around and expecting everyone to infer the new system.
When a brush is repeatedly left outside the holder, investigate the practical reason. The handle may be difficult to remove, the position may be inconvenient, or the user may not understand the arrangement. Correcting that obstacle is more useful than repeatedly putting the brush back yourself.
Give Toothpaste a Home Too
Organised brushes will not completely resolve counter clutter if toothpaste tubes keep migrating around them. Choose an accessible place for the products currently in use, without making anyone reach through the brushes.
Keep reserve tubes elsewhere when appropriate. Avoid turning the toothbrush holder into general storage for combs, containers or heavy accessories. Its stated purpose is to hold brushes. Leaving space around it also makes cleaning and returning items more straightforward.
Three Bathroom Scenarios
A Small Basin Shared by Two People
Begin with the two daily brushes and the toothpaste actually used. If the brushes fit and the wall location is suitable, assign two slots and leave the others empty. Check whether access and wiping the basin surround improve before adding another organiser.
Four People with Different Brushes
Assess the full group together. Four slots do not guarantee that four dissimilar handles and heads will sit comfortably. One brush may need a separate position. Judge the arrangement by usability rather than whether every slot has been filled.
A Basin Beside a Mirror Cabinet
Open the cabinet fully and check the space required to remove the brushes. Moving a bottle or choosing another wall position may solve the conflict. The nearest location to the tap is not automatically the most practical one.
Use the First Week as a Practical Trial
Evaluate three moments: taking a brush out, putting it back and cleaning around the basin. If each action is straightforward, the arrangement is doing useful work. A tidy appearance immediately after installation tells you less than repeated normal use.
Ask each person to try their own position. The person who installed the holder may overlook a reach problem or an awkward viewing angle. Note the specific difficulty and adjust the relevant part of the layout rather than reorganising the entire bathroom.
If the counter is clearer but toothpaste still moves around, improve its location. If the brushes are orderly but the holder is difficult to clean, reconsider access. This keeps changes connected to real problems and avoids accumulating accessories that duplicate one another.
Cleaning the Holder
Remove the brushes before cleaning and keep their ownership clear. The product listing recommends a soft cloth, water and mild detergent, followed by thorough drying before returning the brushes. Pay attention to toothpaste residue around the slots.
Because the material is unspecified, do not assume that abrasive tools, strong chemicals or a dishwasher are suitable. Follow the available care instructions. Likewise, do not repeatedly detach the holder if its fixing arrangement is not designed for that treatment.
Respond to visible residue rather than relying on appearance from a distance. Cleaning the organiser and caring for the brushes are separate tasks. Individual slots do not clean the product automatically, and this holder has no stated sanitising function.
Daily Habits and a Weekly Review
After use and care according to the brush’s instructions, return it to its assigned position. Put toothpaste back too. A short, consistent routine is easier to maintain than a full counter reset every evening.
During a weekly review, check the mounting, visible residue and ease of access. Look for a bottle that now blocks a slot or a cabinet movement that has become awkward. Address the specific issue rather than changing a setup that otherwise works.
Recheck fit when a brush is replaced or another person starts using the bathroom. If the holder becomes loose, stop loading it until the mounting problem has been addressed appropriately. Rearranging brushes does not resolve an insecure fixing.
Common Mistakes to Avoid
Choosing by Appearance Alone
A matching colour does not establish handle compatibility or convenient access. Check fit, capacity and mounting requirements first, then consider appearance among the suitable options.
Treating Capacity as Universal Compatibility
Four positions describe the intended count, not every possible handle shape. Consider how the complete group fits and moves during use.
Mounting Before Testing Access
An empty holder occupies less usable space than a holder being used. Include the brushes, your hand movements and nearby cabinet doors in the assessment.
Assuming Extra Functions or Accessories
Check the package description. Do not assume that cups, toothpaste dispensing, charging or sanitising are included simply because other bathroom organisers offer them.
Before-Use Checklist
Daily brushes have been counted.
Reserve items have appropriate separate storage.
Handles fit without being forced.
Each brush can be removed independently.
Brush heads do not touch in their intended positions.
The users can reach their assigned slots.
Cabinets and mirrors open without obstruction.
The fixing method suits the surface.
The holder is secure before loading.
Cleaning access remains available.
Toothpaste does not block the holder.
Fit will be reviewed when brushes change.
Quick Answers
Where should you begin? Count the daily brushes and identify the actual counter problem.
Can slots stay empty? Yes. There is no need to add unnecessary items.
Does handle fit settle everything? No. Check head spacing and removal as well.
Is it a charging station? No charging function is listed.
Does it sanitise brushes? No. Its stated role is organisation.
When should the setup change? When users, brushes or access requirements change.
Frequently Asked Questions
1. What does a wall-mounted toothbrush holder do?
It gives toothbrushes defined positions on the wall. It can reduce counter clutter and make brushes easier to locate when the handles fit and the location suits the users.
2. How many brushes does this K&M holder accommodate?
The product listing states up to four toothbrushes in separate slots. Check the handles and the arrangement of the complete group before assuming compatibility.
3. Can one or two people use a four-slot holder?
Yes. Use only the positions needed. Empty slots do not need to be filled with spare brushes or unrelated accessories.
4. Will every electric toothbrush fit?
Compatibility is not confirmed because slot dimensions are not provided. Check your particular handle, and keep charging requirements separate from ordinary storage.
5. Does the holder use adhesive or screws?
The listing does not identify the fixing hardware. Confirm the actual mounting method and instructions before preparing the wall or buying installation supplies.
6. Are cups, toothpaste or toothbrushes included?
Those items are not listed as included. The confirmed package content is one toothbrush holder, so plan appropriate separate places for other supplies.
7. What is the best place to mount it?
Choose an accessible position away from obstructions and direct splashing where possible. Check cabinet movement and brush removal space before installation.
8. Does separating brushes mean the holder sanitises them?
No. Separate positions are an organisational feature. The holder has no stated sanitising function and does not replace normal brush care.
9. How should the holder be cleaned?
Remove the brushes, use a soft cloth with water and mild detergent, and dry it before reuse. Do not assume dishwasher or strong-chemical compatibility.
10. What if a replacement brush does not fit?
Do not force the handle into a slot. Check the intended positioning, then use another suitable storage arrangement if the new brush remains incompatible.
A Step-by-Step Starting Plan
Gather the daily brushes and identify their owners.
Move reserve products to appropriate storage.
Check capacity, handle fit and missing specifications.
Confirm the mounting method and surface requirements.
Test the proposed position around normal bathroom movements.
Install according to the instructions and confirm stability.
Assign a position to each compatible brush.
Review real use and correct specific difficulties.
Conclusion
A wall-mounted toothbrush holder is useful when it suits the brushes, bathroom and people using it. Capacity and appearance matter, but secure mounting, convenient access and manageable cleaning determine whether the arrangement remains practical.
Begin with a clear need, verify the relevant details and judge the result during ordinary use. The aim is a bathroom routine that is easier to maintain, without adding more accessories than the space needs.
Quick Summary
Count the daily brushes, check their fit and choose an accessible wall position. Verify the fixing requirements, follow the cleaning instructions and review the layout when brushes or users change. Treat the holder as an organiser, not a sanitiser.
Read Also
For another approach to organising the area around a basin, read the faucet sink organiser guide. Give sink-cleaning tools and toothbrushes separate places appropriate to their different uses:
https://k-m.store/en/faucet-sink-organizer-fit-drainage-guide
You can also explore the household organisation products available from K&M Shopping:
Leave a Comment